Aaaaand here we are with another cheesecake recipe on Bariatric Foodie. Predictable, right?
Ok, ok I’ll admit over the years I can be accused of being a bit cheesecake obsessed.
But that’s mainly because I think they are the post-op dessert. I mean, think about it.
- The main ingredient is cream cheese. Now yes, that can be fatty, but you can control that with reduced fat cream cheese, which you can also get in the Greek variety for added protein.
- You essentially are making a custard. Translation, it bakes slowly and gently. Translation: that makes it the perfect sort of thing to put protein in because…protein needs to bake slowly and gently!
- Lastly, cheesecake tastes good with or without a crust.
So if it seems like I make a lot of cheesecake, it’s because I feel like it’s the bridge between my new healthier self and the old, indulgent desserts I used to love.
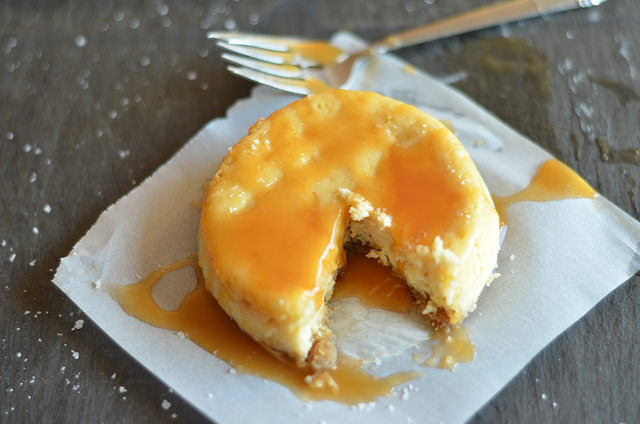
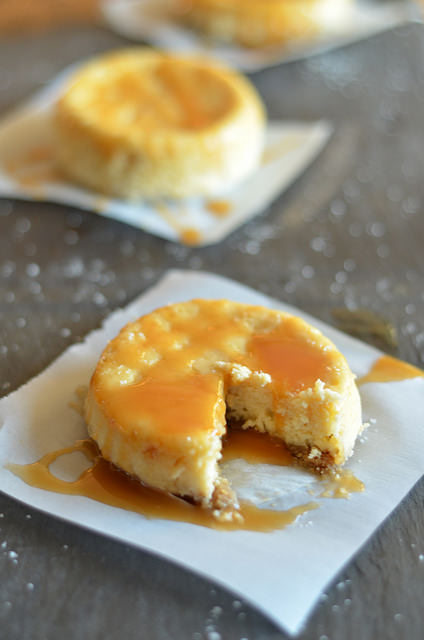
Anyhoo…recently I did a review of a new sugar substitute called Sola, which is inspired by nature and looks, tastes and bakes like sugar. Well to test it out, I made mini cheesecakes. Mini-salted caramel cheesecakes to be exact.
So I figured I should probably give you guys the recipe to that cheesecake because, well, it just looks drool-worthy, doesn’t it? It does, it does.
I also wanted to go over a few tips for cheesecake making success. Because I feel like the main thing that holds people back from making cheesecake themselves is this perception that it’s hard. It’s really not! In fact it can be broken down into a few simple steps.
But first, here are the supplies you’ll need:
- Mini-spring form pans (they cost like $10 for a set of four at the craft store)
- Parchment paper
- a pair of scissors
- A mixing bowl
- A hand mixer (or you could use a stand mixer, thus eliminating the need for a mixing bowl and a hand mixer)
- A scraping spatula
- A 9×13 oven-safe casserole dish
- Optional: A smaller glass casserole dish
Step 1: Prep Your Equipment
Now I am not a crafty person. But this one tip is worth its weight in gold in cheesecake making. Line the bottom of your spring form pans with parchment paper! It’s easy enough to do. Just trace around the perimeter of the pan, cut out your circle, and press it into the bottom of the pan. Easy peasy!

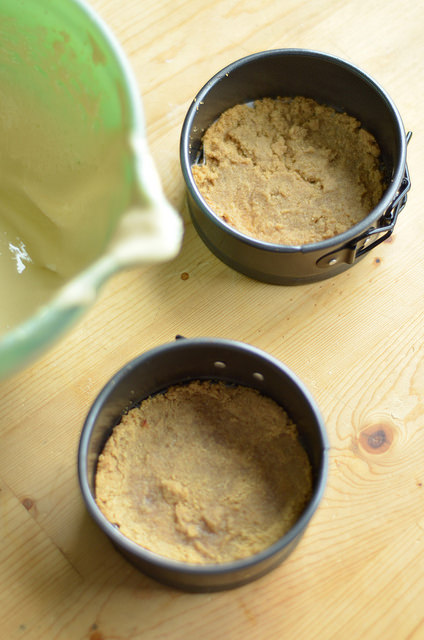
Step 2: Get Crusty…(or not)
It’s up to you if you use a crust or not. I usually do and make it out of high-fiber cereal and a little bit of sweetener. If you are going to use a crust, you should mix up the ingredients and press them into the bottoms of the spring form pans, then bake then at 325 degrees for about 10-ish minutes. My big tip here is to use a bit of cream cheese to make your crust instead of butter. Lower fat, same crust…win/win!
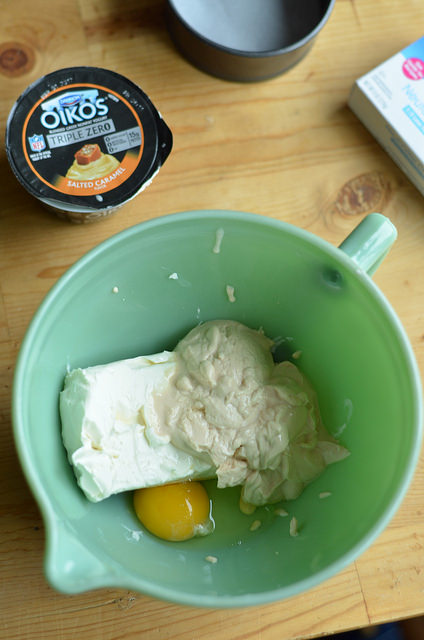
Step 3: Mix it Up
Ok so obviously from the picture above I actually did this before I put together the crust. My point is…it’s much more time-efficient to do the crust first! But next you just wanna mix up your cheesecake batter. For this cheesecake I actually used Oikos Triple Zero Salted Caramel yogurt in place of the sour cream that cheesecake recipes usually call for. If you want, you can probably also sub Egg Beaters for your eggs, but I personally do not do that.
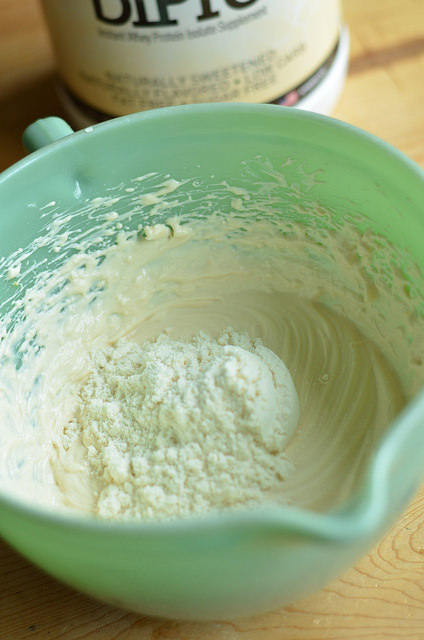
As you can see, I used BiPro USA protein powder, which is my favorite whey isolate protein! The big thing I want to stress here is that I add the protein last, after all the other ingredients are already added in. It just helps to keep the texture of the cheesecake pleasant. Overworked protein is just…no.
Oh, and also, since I used vanilla protein powder, I didn’t use any vanilla extract. If you don’t use vanilla extract, you’ll want to use about a teaspoon of pure vanilla extract in your batter.
Step 4: Get steamy
So here’s the part that usually trips folks up. Now you can obviously put a cheesecake in an oven and it will bake…and it’ll be super chalky (unless, of course, you use massive amounts of fat in which case it will be kinda chalky instead of super). We don’t want to do that.
Instead, cheesecakes need a nice, humid environment so they can cook gently. Now there are two schools of thought on how to make that happen. The first is to put it in a water bath, which basically means you are wrapping the bottoms of your mini-pans with aluminum foil, placing them in a large casserole dish and putting boiling water directly into the dish like so.
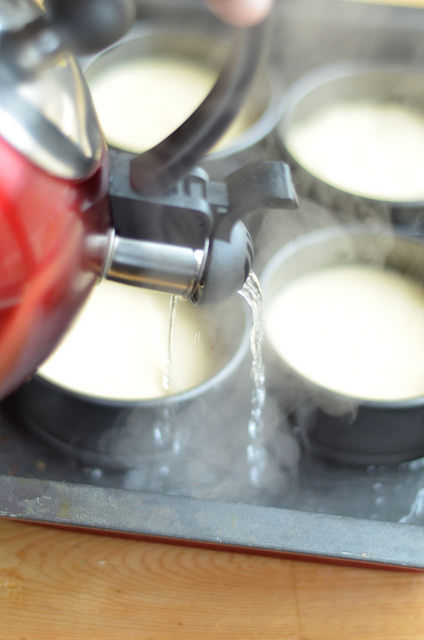
Now…you may notice something in the above pic…I forgot to wrap the bottom of my pans! This resulted in some of my cheesecakes coming out soggy on the bottom (don’t ask me why they all didn’t…they just didn’t!). But if you want to avoid this altogether you can simply fill a smaller casserole dish with boiling water and set it in the oven at the same time you put your cheesecakes in (they still have to go in a casserole dish thought). It’s important to note that, yes, it does have to be boiling water. It should have steam.
And speaking from many bad experiences…it’s best to put the casserole dish on the oven rack, then pour the boiling water into it. 😉
Step 5: Bake it!
So this part takes a bit of practice and intuition. But here’s what I have found to be universally true. You want to bake the cheesecakes for a certain amount of time (usually until it is mostly set…which you can tell by jiggling the spring form pan – with an oven mitt on! – and if it wiggles it’s not set) then turn off the oven, prop open the oven door and allow it to continue cooking as the oven cools down. For me that timeframe looks like 25 minutes of active baking and about 15 minutes in the cooling oven. You can start there and see where it gets you.
You may wonder how you know if you’ve over/under-cooked your cheesecake. Well if you’ve undercooked it, like I said, it’ll jiggle. Noticeably. That means you still have custard in there and it’s not cooked. Continue cooking it until that firms up. If you’ve overcooked a cheesecake there’s one tell-tale sign. It will crack! Yep. It’ll get a crack right across the middle.
Now I don’t want you to panic if that happens. This doesn’t mean the cheesecake is inedible. It just means it isn’t the prettiest thing in the world. But that’s what cheesecake topping is for!
After removing your cheesecakes from the oven, you are going to want to allow them to cool in the pans on a cooling rack. Once they are fully cooled, release the spring form and lift the ring. This is where that parchment paper comes in handy! Simply grab the paper and slide that sucker off the bottom of the pan.
Now after you bake it, you can put whatever toppings you like. Here I stuck with sugar-free caramel sauce and a bit of large-flake kosher salt.
Mine never seem to last very long (this recipe makes four and conveniently we are a four-person household) but if you must store them, they do fine in regular plastic containers with a lid for about 3-4 days.
You, too, can make cheesecake!
I hope this little tutorial is helpful in increasing your cheesecake confidence. It really isn’t that hard to make and the possibilities are endless. Try your favorite flavor, or even a savory cheesecake for fun!

| Servings | Prep Time |
| 4 mini-cheesecakes | 20 minutes |
| Cook Time | Passive Time |
| 30 minutes | 15 minutes |
|
|
|
|
Cheesecake is a dessert that's extremely easy to make weight-loss surgery friendly! Try these mini-ones and add a bit of sweetness to your next gathering!
|
- 8 oz. Low-fat Greek yogurt cream cheese softened
- 1 large egg
- 4 oz. fat-free Salted Caramel flavored Greek yogurt like Oikos Triple Zero
- 1/3 c. whey isolate protein powder vanilla or unflavored
- 1/2 c. Sola granular (or equivalent amount of your preferred sugar substitute that measures cup-for-cup like sugar)
- 2 tbsp. Low-fat Greek yogurt cream cheese softened
- 2/3 c. lightly sweetened, hig-fiber cereal (like Fiber One)
- Pre-heat oven to 325 degrees.
- Line the bottom of mini-spring form pans with parchment paper.
- Pulse cereal and cream cheese together in a food processor until it forms clumps resembling small peas. Press into springform pans and bake for 10 minutes.
- In a mixing bowl combine cream cheese, egg, yogurt, vanilla, protein and sweetener. Beat with a hand mixer on medium for one minute, increasing to high-speed for 2 minutes. Make sure to get all the lumps out!
- Pour over crumb crust. Place pans in a large baking dish. In a separate dish, place boiling water and arrange on the lowest rack of your oven. Place cheesecakes on middle rack. Bake for 30 minutes.
- Turn off oven and crack open oven door. Allow cheesecakes to remain until oven cools down.
- To serve, release springform pan, and gently pull cheesecake off by the parchment paper.
Looking for nutrition information? I don't give it on this website, and here's why!
And here's how you can figure out the information using the exact ingredients you used.
Do you put stats in any of your books? Carbs calories or at least protein grams?
Hi Karen. For a variety of reasons I do not publish the nutrition information for my recipes in my books. Every once in a while you’ll find them here on the site but not very often. Do you know how to run the numbers through an online nutrition calculator? If not, I have a tutorial on how to do it: https://www.bariatricfoodie.com/bf-basics-how-to-figure-out-recipes/
I made this in a large spring form pan with the strawberry oikos triple zero and strawberry bipro… I fanned strawberries on top and made SF strawberry jello to pour over the fresh strawberries. It was a hit with my coworkers today!
Tht sounds awesome! I think I might try your way!
My mother made these for me yesterday with strawberry Oikos since she couldn’t find salted caramel. They’re really good!
Ha ha. Hubby made this and he was all…there is no steam in the oven. I asked if he read your instructions. He said yes. I read them and asked if he put BOILING WATER into the pan and he just looked at me… Lol. I told him to PRE READ the recipe and instructions before. But, it was all good and tasted delicious!