This post is NOT sponsored by Sola, but I use it in the recipe. It’s a great sweetener that I like a lot (read my review!)
Why didn’t any of you tell me eggnog was so easy to make?
Like seriously…of all the things I’ve made from scratch this was one of the simplest to execute.
But it does require you to execute a few techniques correctly and I think that’s why many folks are spooked by it. Well, that and the egg thing.
Thankfully, I’m not like many people. No, no Foodies! When many people avoid tricky techniques, I plunge into them with vigor.
To be clear: this does not always end well.
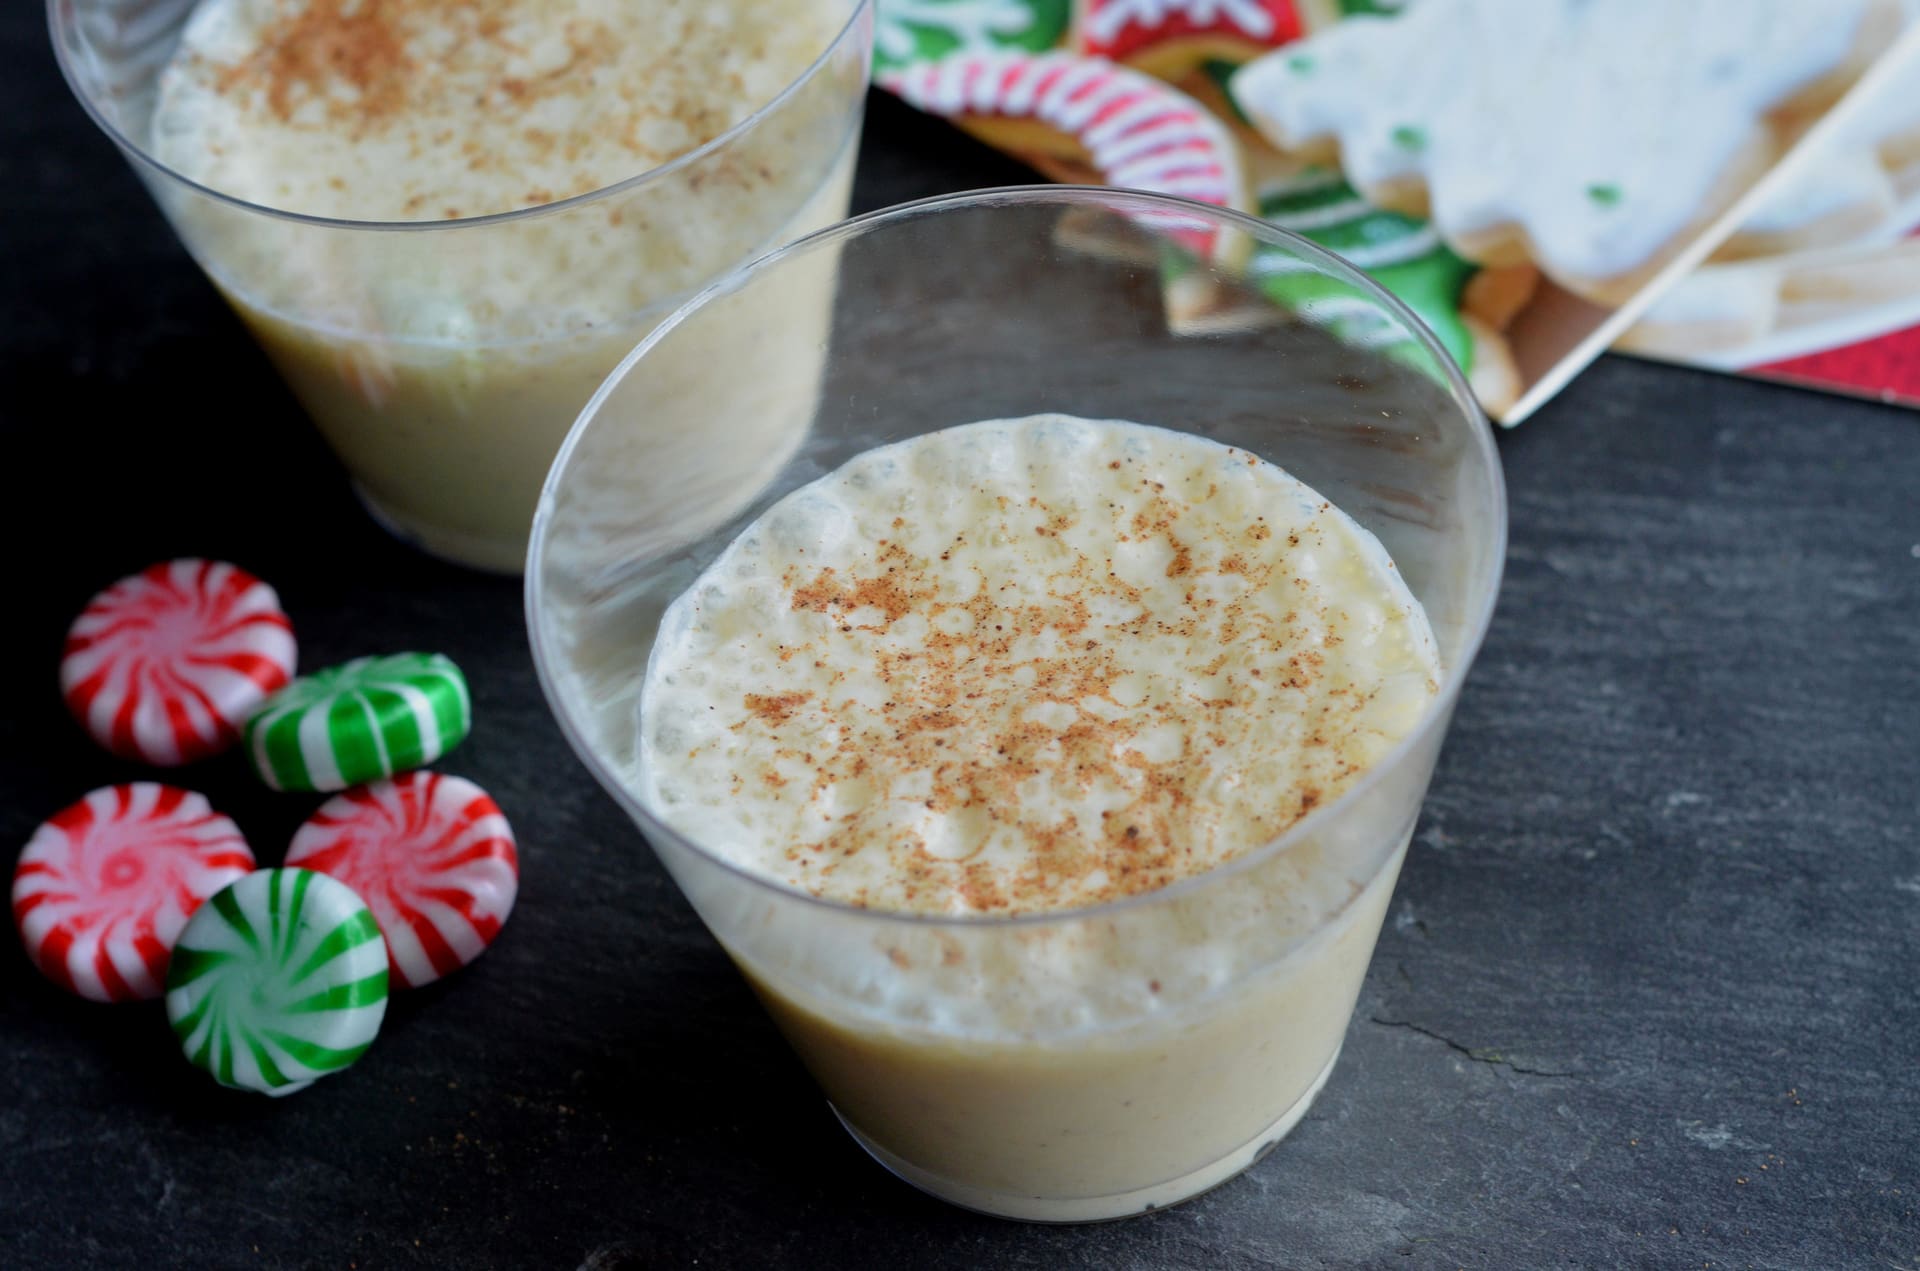
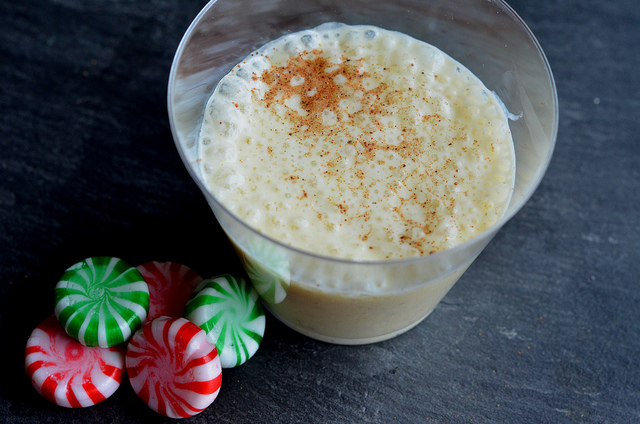
But let’s not talk about that. Let’s talk about eggnog! Now, the first thing I have to say is that I procrastinated about this recipe. Hard. And so as I type it is December 23 in the year of our Lord 2018. I tell you this to say that I did something I don’t like to do: a rush job. Which is why the eggnog you see in the photo is a little bubbly. We’ll get to how that happened in a moment.
The main thing you need to know is that Alton Brown is a genius! His recipe is the one I used as a base recipe and I loved it because he explains everything so very well. Thank you, Alton!
So without further adieu, let’s make eggnog, shall we?
Step One: Prepping the Eggs

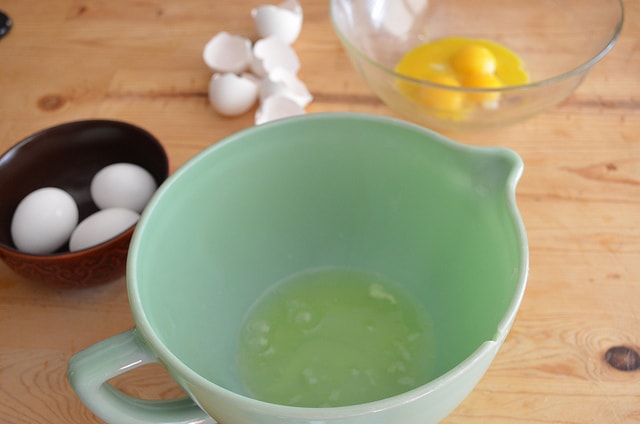
Obviously this thing starts with eggs. Even the name starts with egg. Alton’s recipe calls for four, so I used four!
From there, you’re going to need to separate the eggs, putting the whites in one bowl (and stick it in the fridge for now) and the yolks in another, like so.
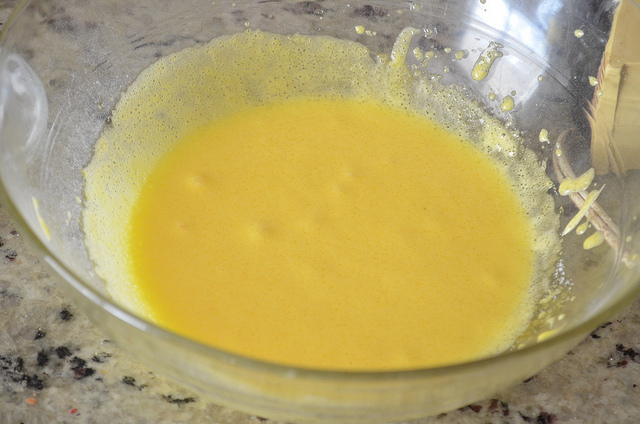
From there you’re going whip out your handy-dandy hand mixer (not stand mixer…although we’ll get to that in a moment). Working on the lowest setting, beat the egg yolks while slowly mixing in your sweetener (for me that sweetener was Sola). I want to emphasize the word slowly. Shake a little bit at a time and mix until it’s all in there. Don’t rush it!
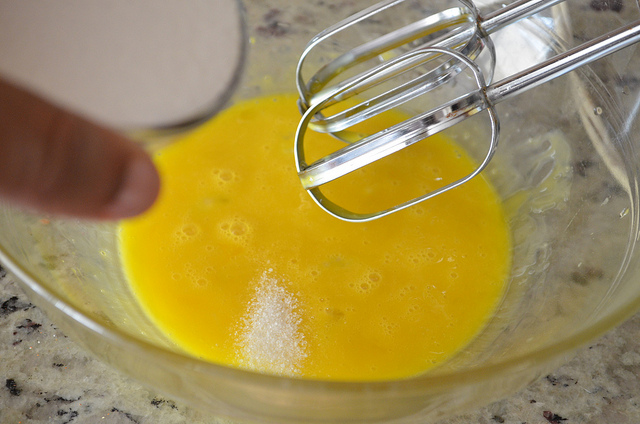
When you’re done, two things should have happened. First, the eggs will have thickened. Second, they will be a slightly lighter shade of yellow. If both those things happen you are good to go.
Step Two: Prepping the milk and cream
So here’s where I started to modify things. Because whole milk + heavy cream = MAJOR DUMPING EPISODE for Nikki. Therefore, we didn’t do that, mkay?
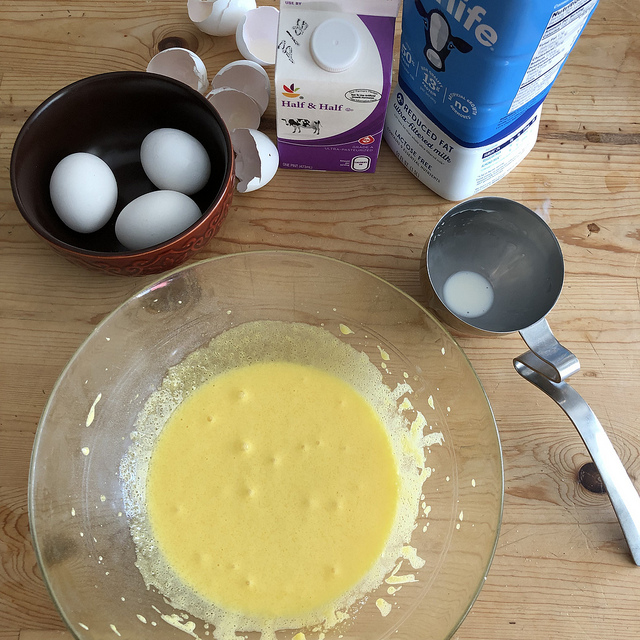
Instead I used a combination of Fairlife 2% milk and half-and-half (which was still kinda sketchy with my system but I know enough about eggnog to know it should not be completely fat free).
So what you’re going to do is put a pint (translation 2 cups) of milk and 1 cup of half-and-half in a sauce pan and set it over low-medium heat. Allow it to come to just a boil. Watch it! Milk can go from slow simmer to over-boiling very quickly.
Step Three: Tempering the egg yolks
Now this is the part most folks get nervous about, which is why most of us don’t make eggnog or homemade ice cream that much anymore.
Tempering eggs is not a big deal. Let’s go through the steps.

The first thing you want to do is have a whisk and something you are using as a ladle at the ready. Start whisking the egg yolks before adding anything to them (for 2-3 seconds, max). From there you want to ladle about 1/4 cup of the hot liquid out of the pan and slowly add it into the egg yolks. But GO SLOWLY. Seriously. Think more of a dribble than a pour. And whisk at the same time. Never. stop. whisking.
From there, repeat the process about 3 or 4 more times. If you dribble slowly, this will take a few minutes but it also almost guarantees your yolks come up to temperature, which they need to be in order for the next part to go right.
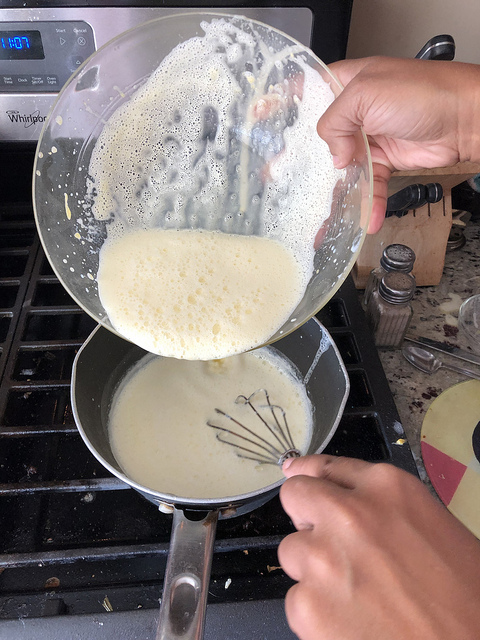
Next, we’re going to add our warmed up yolks back into the saucepan with the rest of the hot liquid. This is always a moment for me. Will they scramble? Will they blend? Oh, the suspense!
But if you take my advice, dribble slowly, use about four ladles of hot liquid, it’ll be fine.
However, if you get scramble, unfortunately it’s game over. You can strain it out but the mixture will have lost some of its ability to thicken and there will probably be a lingering taste of egg scramble in your final product so I personally would advise against using it.
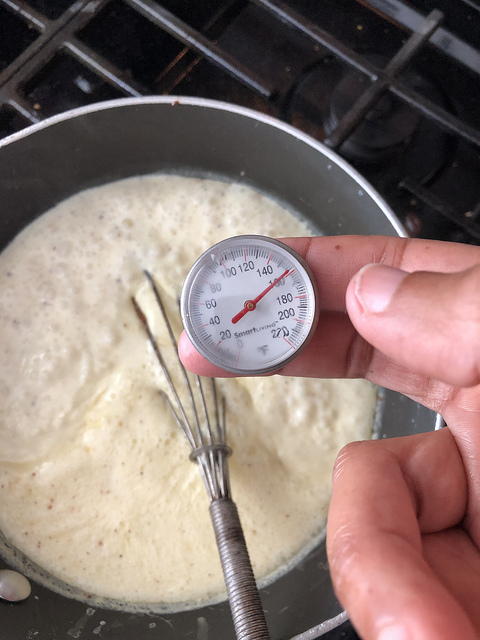
From there, put the pan back on a low flame and cook the mixture until it reaches 160 degrees.
Step Four: Flavoring
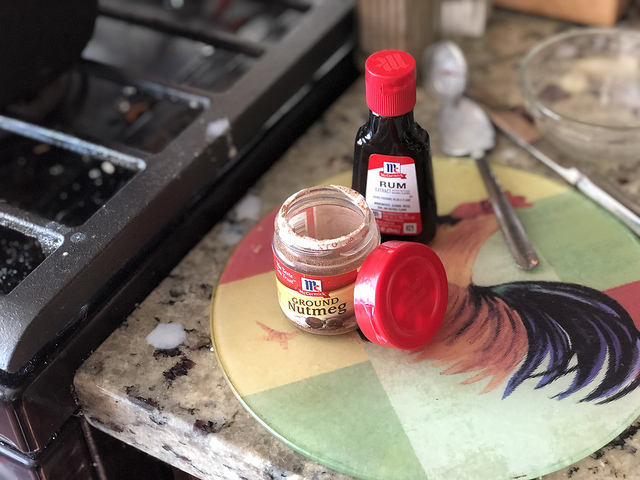
Now traditional eggnog can be made with a few different kinds of liquor. Alton likes bourbon. Many people use rum.
I have children. Who like eggnog. Therefore, we aren’t using either of those.
Instead, I turned to my good friends at McCormick and I use rum extract. You’d be surprised how legit it tastes! (Btw, if you’ve never used it before, rum extract is in the same section of vanilla extract. No…it really is. You just have to look for it!)
Right after you turn off the pan from cooking, add in the rum extract. Luckily the folks at McCormick knew I’d have no clue how much to add and told me on the back of the box!
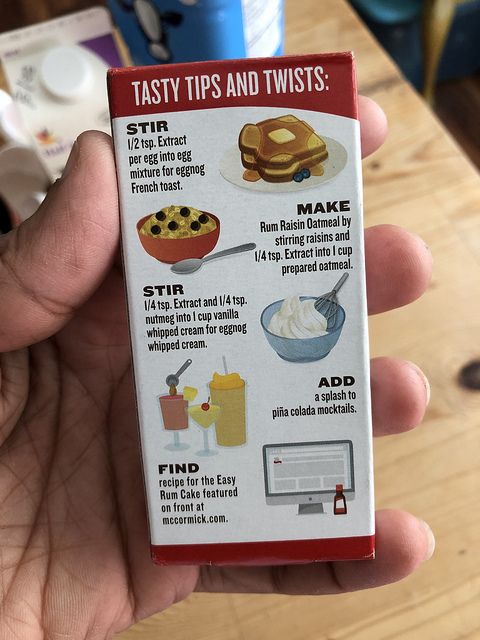
You are also going to add a teaspoon of nutmeg, which is the dominant flavor of eggnog. Alton loves freshly grated nutmeg. I had already ground. And no car. So guess what I went with? Moving right along…
From there, put the mixture in a bowl, let it cool, then stick it in the fridge for an hour or two and go do something fun.
Step Five: Finishing it off with the egg whites
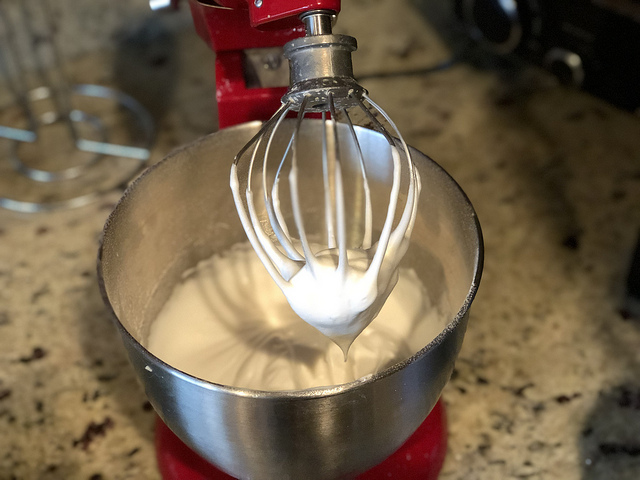
So remember those whites we put in the fridge all the way back in step one? It’s time to get back to them. And that’s where we get to use the stand mixer.
Fit your mixer with the whisk attachment and dump the whites in your bowl. Then turn the mixer to the highest setting. If you want to add protein, now is the time to do it. I used BiPro USA unflavored protein because it adds protein without adding any more carbs. I add that right when I start the whites but, like the sugar in the egg yolks, you want to go slowly. We don’t want clumps! You’re also adding that additional tablespoon of Sola.
We are going to beat the eggs to stiff peaks, per Alton. Stiff peaks means when you lift the whisk attachment (or the hand mixer, if that’s what you’re using) it forms a peak that doesn’t drip or change shape.
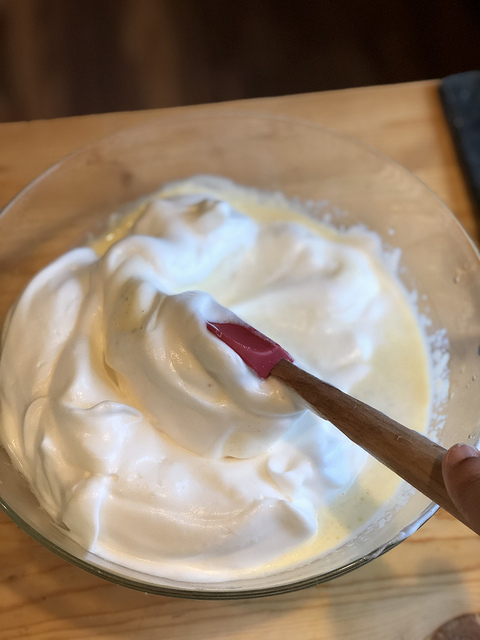
From there, grab the egg yolk mixture from the fridge. Add the whipped whites and gently fold them into the mixture until they are combined. A warning: it’s going to seem too thick. And bubbly. It’s not!
The egg whites just got a lot of air whipped into them. It will release that air and that’s where the bubbles come from. If you stick it in the fridge for a few hours, you should come out with a bubble-free mixture. That didn’t happen for me because I was racing daylight to get pictures for this blog post because…did I mention that, as I type this, it is December 23?!? Yeah. So I didn’t have the time to spare.
And…that’s it! That’s the entire process of making eggnog. It wasn’t nearly as hard as I had it made out to be in my head. In fact, it’s pretty much the same process as making ice cream custard, and I’d argue that, if you wanted to, you could stick this eggnog (or any eggnog for that matter) in an ice cream maker when you’re tired of drinking it and have a nice frozen treat for later!
Let’s talk storage for a moment. Because this is important. This can be stored in the fridge (on a shelf, not in the door) for about a week. Remember, you whipped up egg whites in this so this is not negotiable! Thankfully, the stuff is good so I doubt it’d last that long.
Update: If you don’t want the egg whites…
So…after I first published this post in 2018, I learned something useful. You can TOTALLY skip the egg whites part of this whole deal and your egg nog will be completely fine! Now there are pro’s and con’s to this, so let’s discuss them, quickly. (Because I know you are just trying to scroll to get to the recipe!)
Pro’s:
- Some of you are freaked out by the notion of having uncooked egg whites in your egg nog
- I will admit, this made my egg nog wayyyyyy thick. We added more milk on a cup-by-cup basis to thin it out
Con’s
- You lose some of the protein when you nix the egg whites.
- However, that can be easily remedied by added 1/2 scoop of your favorite unflavored or vanilla protein powder for every 4 oz. of egg nog
So there you have it. Everything I know about making egg nog after weight loss surgery. Enjoy!

| Servings | Prep Time |
| 8 servings | 30 minutes |
| Cook Time | Passive Time |
| 10 minutes | 2 hours |
|
|
|
|
This take on the classic holiday drink takes out the sugar and the liquor and adds a bit of protein!
|
- 4 egg yolks
- 1/3 c. Sola granular sweetener (plus one additional tablespoon)
- 1 pint Fairlife 2% milk (or 2% milk of your choice)
- 1 c. half & half
- 2 tsp. rum extract
- 1 tsp. nutmeg
- 4 egg whites
- 1 scoop unflavored protein powder (equal to about 30g)
- In a mixing bowl, beat eggs on low with a stand mixer, slowly adding in the sweetener until all is incorporated. Egg yolks should lighten in color and thicken.
- Combine milk and half & half in a sauce pan and set it over low-medium heat. Bring just to boiling before turning off the heat.
- Start whisking or beating the egg yolks for 2-3 seconds before slowly ladling in a quarter cup of the hot mixture, mixing constantly. Be sure to go very slow adding the liquid to gently raise the temperature of the eggs. Repeat 3 times, ending by mixing the egg/milk mixture for about 20 seconds.
- Immediately add the yolk/milk mixture to the remaining hot liquid in the pan and stir. Turn the heat back to low-medium and cook until temperature reaches 160 degrees.
- Add nutmeg and rum extract and stir. Transfer to a bowl, cover and refrigerate 2 hours.
- In a mixing bowl or a stand mixer, start whipping egg whites, slowly adding in protein powder and additional sweetener. Beat to stiff peaks.
- Remove the cold yolk/milk mixture from the refrigerator and add egg white mixture to it. Gently fold the egg whites into the yolk/milk mixture until full combined. Mixture will seem thick and slightly bubbly.
- Return to the refrigerator until ready to serve. Eggnog will be good in the refrigerator for one week.