Recap: In honor of the release of The Bariatric Foodie Breakfast Book we’re talking about breakfast
this week!
this week!
The next major section of the book is called “Smart Carbs.”
Many folks are afraid of carbs, in general. With all the publicity about them,
it’s no wonder. So before you get this book and freak out, I suggest you read my
primer, “Carb Confusion” to brush up on what carbs really are (I find many
people really do have the wrong idea) and why they are actually a good part of
an overall healthy eating plan.
Now that we’re all on the same page, I should say in the
book I mainly tackle one type of carb: starches. Yes, starches can be made in
ways that are weight-loss surgery friendly and beneficial to your body and
overall health. You just have to be smart about it, hence the chapter name.
book I mainly tackle one type of carb: starches. Yes, starches can be made in
ways that are weight-loss surgery friendly and beneficial to your body and
overall health. You just have to be smart about it, hence the chapter name.
In my estimation the easiest type of starch to make weight-loss
surgery friendly are quick breads. For those who don’t speak “food-ese” a
quick-bread, generally speaking, is just what it sounds like, a bread that can be
made quickly by nixing the yeast (and the multiple rises/wait times it requires)
and using more “cakey” ingredients. Examples of quick breads include banana and
pumpkin bread, both of which already have recipes here on the blog (click the
links on the words to get to them).
This quick bread started out with my over-abundance of roasted pear butter. I made a lot of that stuff and didn’t want to waste any of it. The
divas liked it (my oldest daughter, who hates pears, loved it…score!). One
thing I know about pear/apple butter is that it can be used to replace some
of the oil/butter in baking to yield a moist result. That information in hand,
I set out with a very specific goal: to make a protein quick bread
recipe that contains no protein powder.
My other recipes do but variety is good, right?
In the book, I share the recipe to a very easy, make-ahead
baking mix you can make and store to streamline this process even further!
baking mix you can make and store to streamline this process even further!
As promised I’m giving you the recipe but also THREE ways
you can prepare it.
Pear Spice Protein
Quick Bread
Quick Bread
Ingredients:
Wet Ingredients:
- 1.5 c. pear butter/sauce (or natural apple sauce)
- ½ c. no-calorie sweetener (if you are using natural apple
sauce, also add ½ tsp. apple pie spice) - 1 tsp. vanilla
- 2 large eggs (or equivalent amount of liquid egg substitute)
- Up to 2/3 c. milk (I used unsweetened almond milk)
Dry Ingredients:
- 1 c. oat flour (don’t freak out, I’m going to tell you how
to make this!) - 1 c. soy flour (if you don’t like soy flour use another type
of non-white flour replacement such as almond meal or garbanzo bean flour) - ½ c. flax meal (NOT flax seed)
- ¼ tsp. salt
- 1 tsp. baking powder
Directions:
How to make oat flour: Place 1 c. quick cooking oats (I don’t
recommend traditional oats for this) in a food processor (I used my Magic
Bullet knock-off) and whiz until it has been completely pulverized into flour.
recommend traditional oats for this) in a food processor (I used my Magic
Bullet knock-off) and whiz until it has been completely pulverized into flour.
Preheat your oven to 350 degrees.
Mix together pear or apple sauce, spices and vanilla in a
large bowl. Add eggs, one at a time, and mix thoroughly. Set aside.
large bowl. Add eggs, one at a time, and mix thoroughly. Set aside.
In a separate bowl mix together all the dry ingredients and
whisk to thoroughly combine them.
whisk to thoroughly combine them.
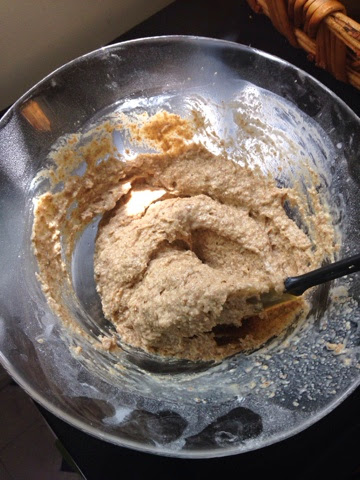
Mix the dry ingredients into the wet stirring. The result
will be thick. Add enough milk to loosen the batter to the consistency of a
thick bowl of oatmeal (Note: no matter what don’t use more than 2/3 c. milk but
feel free to use less if it doesn’t take that much).
will be thick. Add enough milk to loosen the batter to the consistency of a
thick bowl of oatmeal (Note: no matter what don’t use more than 2/3 c. milk but
feel free to use less if it doesn’t take that much).
Give the batter a taste. It should taste like really good (although
maybe a tad too sweet) apple/cinnamon oatmeal. If not, adjust spices
accordingly! Don’t worry that it tastes too sweet in the batter form. The oven
will do its magic and it will all even out.
maybe a tad too sweet) apple/cinnamon oatmeal. If not, adjust spices
accordingly! Don’t worry that it tastes too sweet in the batter form. The oven
will do its magic and it will all even out.
Now…here’s where you can get creative.
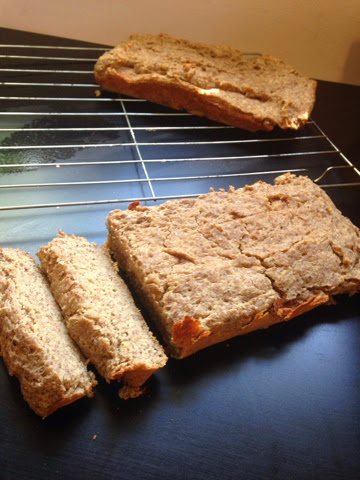
Make loaves: This
works well as either a traditional loaf or in mini-loaf pans. The mini-loaf
pans are great for making things ahead so that you can wrap and freeze. These
loaves freeze well when properly wrapped. To eat, you’d simply set the loaf out
in room temperature and allow it to thaw. You can nuke it if you want warm
bread. What you see at the top of this post are two “short loaves” (meaning I divided the batter
between two loaf pans so that it wouldn’t be so tall). For me, the short loaves
are easier to handle AND gave me the opportunity to test out idea #3 below.
Directions: If doing a full loaf, spray your loaf pan with
nonstick cooking spray made for baking (they sell it at the grocery store).
Fill the pan with batter (it will almost completely fill the loaf pan). For
short loaves, use two pans. For mini loaves, spray the mini-loaf slots and
divide the mixture evenly. This makes about 6-8 loaves, depending on how much
batter you use.
Bake time for full/short loaves: 25-30 minutes
Bake time for mini-loaves: 20-25 minutes
Make mini-muffins:
This makes about 24 mini-muffins, give or take a few. These too freeze well and
are great for grab & go. Just make sure you’re using a good non-stick
mini-muffin tin!
This makes about 24 mini-muffins, give or take a few. These too freeze well and
are great for grab & go. Just make sure you’re using a good non-stick
mini-muffin tin!
Directions: Distribute batter evenly into mini-muffin tin
slots. Bake for 15-20 minutes or until a toothpick inserted comes out clean.
slots. Bake for 15-20 minutes or until a toothpick inserted comes out clean.
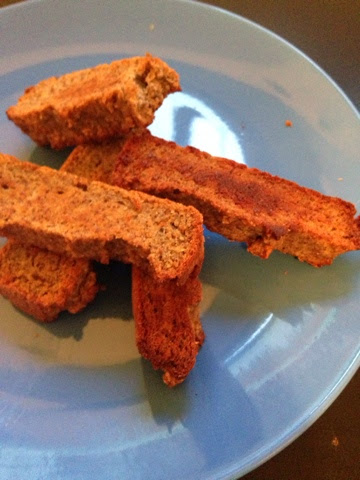
Make (protein) biscotti!
Well…sorta. Technically biscotti is a twice baked cookie but my loaf turned
out so wonderfully moist I just knew I could pull it off so I tried and it
worked! To make it into biscotti, make a “short loaves” (simply meaning divide
the batter between two loaf pans). Allow them to cool after coming out of the
oven then slice them into sections about a half inch thick. Spray down a cookie
sheet with nonstick cooking spray and bake them for an additional 7-10 minutes
on each side. Both sides should brown. Your result will be firm but not quite
as rock hard as a traditional biscotti.